
Fourth of July makes me think of hamburgers, hotdogs, swimming pools, family get togethers or in our case extra time to spend on our home remodel. We have been working feverishly on Spotswood House and are extremely thankful to have an extra set of hands this week (thanks Chris and Pam). So, here is what we have been up to.
Windows: I guess I didn’t pay much attention but about half of our windows are painted white and the other half are the natural wood color. Natural wood windows are beautiful, especially if you are into Craftsman Style homes but our house is a little bit on the modern side so the wood windows look REALLY out of place.
Before: This picture was originally taken for the floors (which are beautiful) but look at those out of place wood windows.

After: Doesn’t it look so much lighter, brighter, and cleaner?? I love it.

Floor vents: Seriously, why am I talking about floor vents. Well, it’s the little things that matter and our original floor vents were nasty. A quick trip to Home Depot solved that problem. I hope I don’t have to point out which vent is the old one (the one on the bottom).

Window panels: So I have to admit my favorite part of the remodeling process is the decorating and I really haven’t had the opportunity to do anything until now. I found these amazing West Elm panels on Facebook Marketplace for like $21 and found the perfect matching curtain rod at Home Goods for like $17. These are in our tiny “Misty Coast” back bedroom. I really need to try to get a better shot, this does not do them justice.


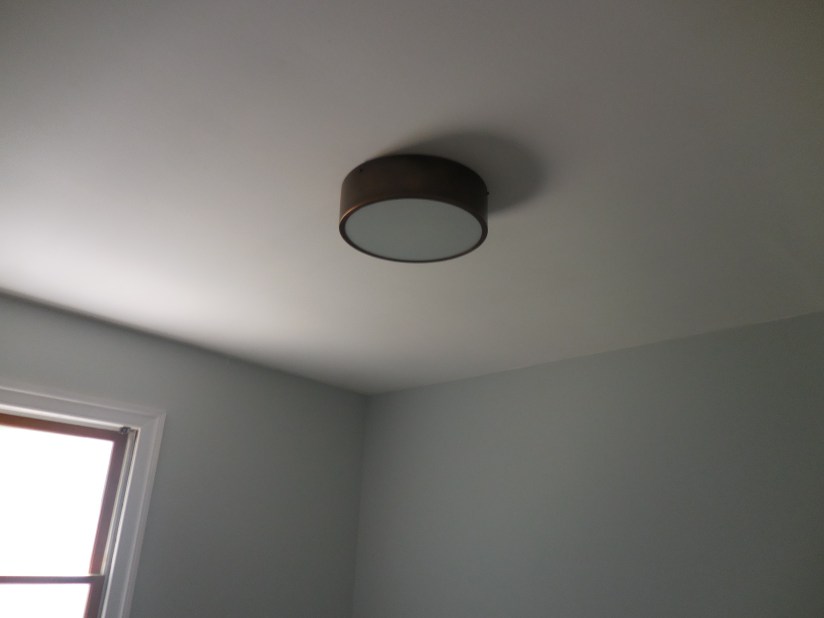
Flush mount light: In our tiny back bedroom we had the most generic flush mount light, so ugly. I found a new Restoration Hardware flush mount light on Facebook Marketplace for $100. It makes a world of difference and matches the curtains above perfectly.

 Before shot on the left, spiders living inside light on the right
This just confirms how bad my picture taking skills are! The flush mount light looks way better in person.
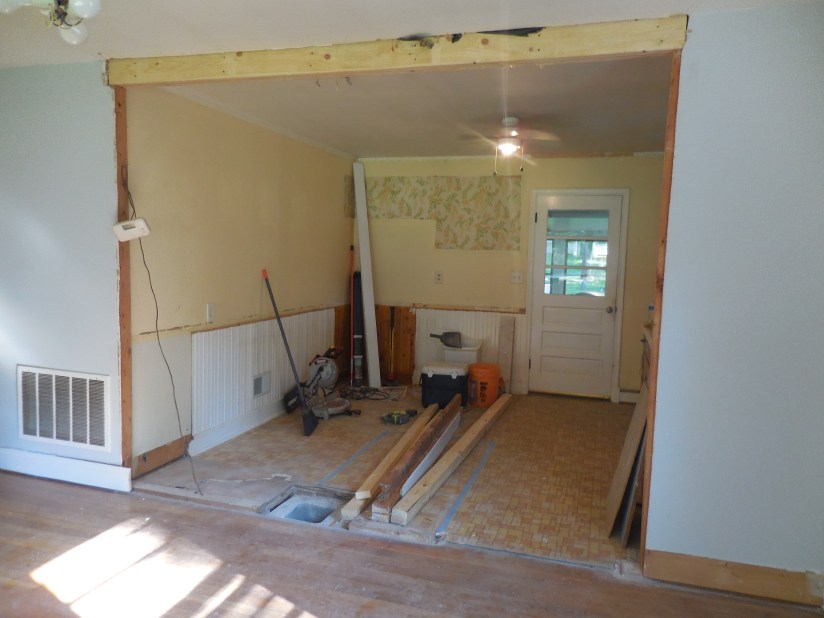
Kitchen: Our goal was to open the kitchen up to the living room. In order to make this possible we (and by we, I mean Adam) had to remove the fireplace smack dab in the middle of the kitchen and insert a beam to hold the walls up. This task would not have been possible without the help of Adam’s parents.
Before: The fireplace is behind the drywall right in the middle section of the cabinets.

During: Walls down, fireplace still up

After: Walls out, fireplace out, and beam in. Wide open space ahhhhhhhh
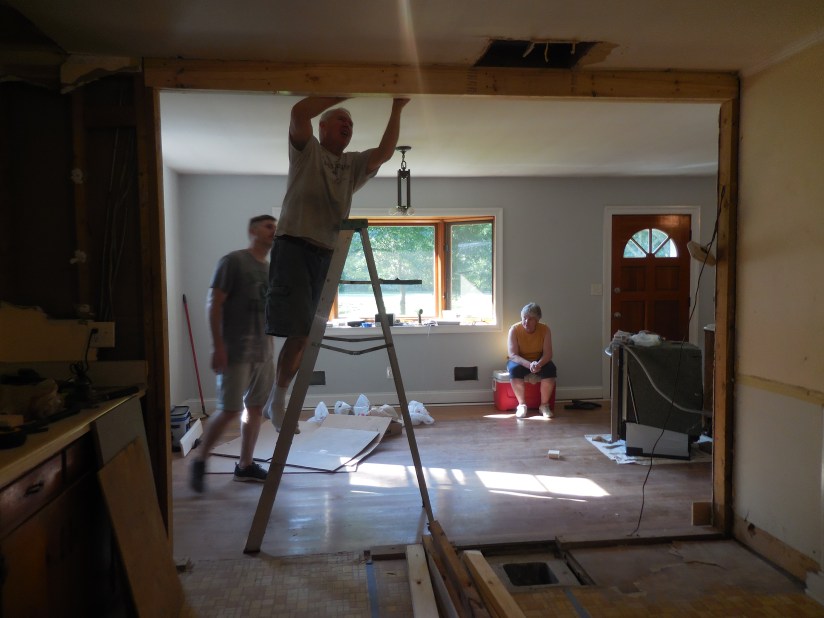
Adam and his parents make a cameo in the shot above.
We just had a dumpster delivered today so lots more remodeling to come. Until next time, Lindsey
